Today is my last day as a Guest Designer for the CAS Colours & Sketches Challenge. I have so enjoyed being a part of this challenge and will continue to participate in their challenges. I am grateful and thankful to have had this opportunity.
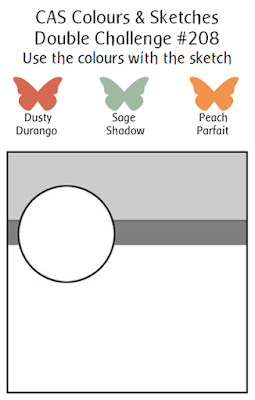
My card, using the sketch for this weeks' challenge, is a thank you card. I thought it would be an appropriate farewell card to the whole team at CAS Colours & Sketches.
For the swirly flowers, I used the Swirly Scribbles Thinlits Dies. I cut one of the smaller swirls from Crushed Curry and one from Pumpkin Pie. I cut four large swirls from Emerald Envy and glued them together to give a bit of dimension to the large swirly flower. Under the die-cuts, I stamped images from the Swirly Bird stamp set using the same colors as the die-cuts. The colors used are Emerald Envy, Crushed Curry and Pumpkin Pie. The leaves were stamped in Mint Macaron and cut using the Swirly Scribbles Thinlits Dies. Again, the stamp set is Swirly Bird. The sentiment is from the Rose Wonder stamp set and stamped using Tuxedo Black Memento ink. For the finishing touch, I added a few Rhinestone Basic Jewels.
For all the CAS Colours & Sketches Challenge details and to share your project, click the image below.
Thanks for stopping in at the Coffee Pot Stamping Cafe,
Marsha
▼
Tuesday, February 28, 2017
Wednesday, February 22, 2017
Watercooler Wednesday Challenges #107
This week Penny is hosting our Masculine "Anything Goes" Challenge at Watercooler Wednesday Challenges. For my card, I decided to do little stamping and more die-cutting. I'm a huge Downton Abbey fan and used some of my Crafter's Companion product for this design.
The card base is Naturals White to which I added a layer of Cherry On Top Designer Series Paper Stack. First I cut a strip of Tip Top Taupe. I ran it through the Big Shot using the Brick Wall Embossing Folder and attached it to the card front. The silhouette is cut from Basic Black using the Downton Abbey Die. Then, I ran it through the Big Shot using the Square Lattice Embossing Folder. I placed it right on top of the Tip Top Taupe wall.
The car is from the Downton Abbey Collection. It's stamped using Basic Black Archival ink. I did fussy cut it out and popped it up with Stampin' Dimensionals. What you cannot see well in the photo, is that I covered it with Clear Wink of Stella to give it a shimmer. That stuff is hard to photograph. The sentiment is from the Sprinkles of Life stamp set and stamped in Basic Black Archival ink. A few silver sequins and it was all done.
Most of the Stampin' Up!® is retired but I still love to go back and play with some of my favorites.
For all the challenge details and to share your project, visit Watercooler Wednesday Challenges by clicking the image below. We'd love to have you join us. You have until Monday, February 27th at 6:00 p.m. Central Time to link your project.
Thanks for stopping in at the Coffee Pot Stamping Cafe,
Marsha
Tuesday, February 21, 2017
CAS Colours & Sketches Challenge #211
It's a color challenge at the CAS Colours & Sketches Challenge as well as my third week as a Guest Designer. And, it's another birthday card. I have quite a few birthdays coming up so it was time to get some more cards done and ready to send.
Balloons are always good for birthdays. I cut two balloons out of the Cherry On Top Designer Series Paper Stack and one from the 2016-18 In Color Designer Series Paper Stack using the Hearts Balloons Dies from My Favorite Things. I added some Clear Wink of Stella over the balloons for a subtle shimmer. They sure are bright and cheerful in the Cucumber Crush, Peekaboo Peach and Watermelon Wonder colors.
The card base is Whisper White Thick and attached a layer of Whisper White onto a layer of Watermelon Wonder. The strings for the balloons were stamped using Tuxedo Black Memento ink. The sentiment is also stamped in Tuxedo Black Memento ink and is from the Beautiful You stamp set. I popped up the balloons with some Stampin' Dimensionals.
For all the CAS Colours & Sketches Challenge details and to share your project, click the image below.
Thanks for stopping in at the Coffee Pot Stamping Cafe,
Marsha
Monday, February 20, 2017
What Will You Stamp? Challenge #104
It's so exciting to share with you that I was selected to be a Guest Designer for this weeks' challenge at What Will You Stamp? I love challenges and being asked to design for them is
such an honor.
This week we are featuring the Lift Me Up stamp set. It's one I've not yet purchased so borrowed it from friend. Now that I've had the opportunity to play with it, it has gone on my ever lengthening wish list.
For my design, I made a scene of hot air balloons floating over the mountains. This was to be a practice card, which is why it's done on Naturals White retired cardstock. But, it turned out so well, that rather than starting over, I used it.
First, I stamped the mountains from the In the Meadow stamp set in Basic Black Archival ink and colored them using the Early Espresso Watercolor Pencil. The meadow was sponged using Wild Wasabi and Pear Pizzazz inks. The grass was stamped using Old Olive ink as are the flowers. Using Stampin' Write Markers, I added Flirty Flamingo, Pink Pirouette and Rich Razzleberry inks to the blooms. Of course, I had to get my little Dapper Denim butterflies flitting around the flowers.
Using the Lift Me Up stamp set, I stamped the two balloon images onto Whisper White; one in Dapper Denim and one in Sweet Sugarplum. The clouds were stamped using Smoky Slate ink. Then, I cut the balloons and clouds out using the Up & Away Thinlits Dies. I attached them to the card base with Stampin' Dimensionals. I added a few Rhinestone Basic Jewels for the finishing touch.
For all the What Will You Stamp? Challenge details and to share your project, click the image below.
Thanks for stopping in at the Coffee Pot Stamping Cafe,
Marsha
Sunday, February 19, 2017
Bless Your Heart
It's a beautiful, warm, sunny day here in Iowa. Given that it's February and the temperature is already 43 degrees at 9 a.m. with a high expected in the 70s, who could ask for more! It's usually cold and snowy this time of year for us.
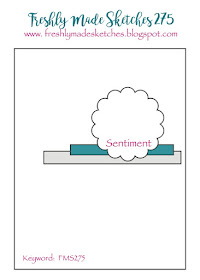
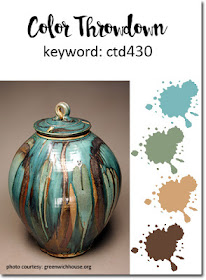
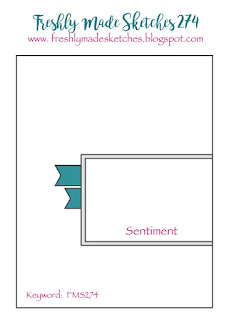
Before I head out and about to enjoy this day, I wanted to share a card I made combining three challenges, something that is not always that easy to do. But, Freshly Made Sketches, Color Throwdown and Stampin' Royalty all work well together and here is the result.
Stamp Set: Jar of Love (sentiment); Ink: Early Espresso; Cardstock: Crumb Cake, Early Espresso, Tempting Turquoise; Patterned Paper: Adventure Abound Designer Series Paper Stack (retired), Love Blossoms Designer Series Paper Stack (retired); Other: Pocket Die (Taylored Expressions), Pearl Basic Jewels, Stampin' Dimensionals. Stampin' Up! product unless otherwise noted.
The sketched I used is from the Freshly Made Sketches Challenge. The colors are from the Color Throwdown Challenge and a project using dies is from the Stampin' Royalty Challenge. For details of each challenge and to share your project, click the images below.
Thanks for stopping in at the Coffee Pot Stamping Cafe,
Marsha
Thursday, February 16, 2017
Wacky Watercooler Spring Fever Blog Hop
Welcome to our February Spring Fever Blog Hop. Each month, on the third Thursday of the month, a group of us get together to hop and share projects from Stampin' Up!'s current catalogs. It's always a lot of fun. Today's hop is all about Spring and I must say that this week in Iowa, with 60 degree temperatures, it's going to feel very springlike.
You should be coming to my blog from Kath Ricks. After your visit with me, head on over to Libby Fens. And, as always, our Hop runs in a circle. Whether you start at the top and go forward or start at the bottom and go backward, you will always wind up where you started.
With 60 degree temperatures here in Iowa for the next eight days, it's definitely feeling like Spring. I'm just hoping that we don't get a nasty March snowstorm. It's been known to happen.
The projects I made all feature some aspect of Spring. It could be through a word or a flower or a vibrant color.
Stamp Set: Beautiful You, Crazy about You, Jar of Love, Sunshine Sayings; Inks: Mint Macaron, Pacific Point, Tuxedo Black Memento; Cardstock: Pacific Point, Whisper White, Whisper White Thick; Other: Stitched Shapes Framelits Dies
Stamp Set: Lift Me Up; Inks: Emerald Envy, Tuxedo Black Memento; Cardstock: Emerald Envy, Peekaboo Peach, Whisper White, Whisper White Thick; Other: Rose Garden Thinlits Dies, Up & Away Thinlits Dies, Cloudy Day Embossing Folder (retired), Clear Wink of Stella Brush, Rhinestone Basic Jewls
Stamp Sets: Avant Garden, Wetlands (sentiment); Inks: Emerald Envy, Melon Mambo, Soft Suede, Tuxedo Black Memento; Cardstock: Melon Mambo, Whisper White, Whisper White Thick; Other: Pearl Basic Jewels
That is all from me. The next stop on your tour is Libby Fens. To see her wonderful projects, click the image below.
If you'd like to revisit Kath Ricks and see her great projects again, click the image below.
To start at the beginning you can click the image below to go back to the Wacky Watercooler Stamping Blog.
Thanks for stopping in at the Coffee Pot Stamping Cafe,
Marsha
Wednesday, February 15, 2017
Watercooler Wednesday Challenge #106
What can I say, I love sparkle! Heidi is hosting the challenge this week. When I saw she had picked sparkle as the theme for her Clean And Simple (CAS) challenge, I knew exactly what I wanted to do.
The base is Whisper White to which I added a layer of Crumb Cake. The flower is cut from glitter felt using the Tattered Florals Dies from Tim Holtz. To the center I added a burnished silver brad. It's a bit hard to see but the word sparkle is cut from Silver Glimmer Paper using a Taylored Expressions Die.
And that, as the they say, is that! A very simple card that took no time at all to put together. And, you may have noticed that there is no stamping on the card.
It's one destined for my note card shelf as I like to keep cards on hand to send to my grandchildren. My oldest granddaughter is to be the recipient of this one, eventually.
For all the challenge details and to share your project, visit the Watercooler Wednesday Challenge by clicking the image below. We'd love to have you join us. You have until Monday, February 20th at 6:00 p.m. Central Time to link your project.
Thanks for stopping in at the Coffee Pot Stamping Cafe,
Marsha
Tuesday, February 14, 2017
CAS Colours & Sketches Challenge #210
My second card as a Guest Designer for CAS Colours & Sketches Challenge, is a birthday card I made for my sister. She will be celebrating a milestone birthday and will turn 60 on February 16th. She loves purple so I always try to add the color somewhere on the cards I make for her.
For this one, I attached a strip of Graphic 45's Secret Garden Patterned Paper to a Whisper White Thick card base. To be honest, I had planned to place a line of bakers twine down the center of the colored strip but forgot to add it before I attached everything. Instead, I drew a line using my Elegant Eggplant Stampin' Write Marker. It worked.
On a piece of Whisper White I stamped the sentiment from the Jar of Love stamp set using Elegant Eggplant. Next, I cut it out using the Mini Frame 4 from Taylored Expressions. The piece I used is actually the center of the frame. I also cut one in Elegant Eggplant and placed the frame over the center cut using Stampin' Dimensionals. The butterflies are punched from Elegant Eggplant using the Elegant Butterfly Punch. I attached them using Tombow Multipurpose Glue. Down the center of each butterfly, I placed some Rhinestone Basic Jewels. The sentiment on the lower right is from the Sunshine Sayings stamp set.
Before I attached the frame and the butterflies, I spritzed them with some Radiant Rain Shimmering ICE Mist. It added just a wee bit of sparkle to the card.
For all the CAS Colours & Sketches Challenge details and to share your project, click the image below.
Thanks for stopping in at the Coffee Pot Stamping Cafe,
Marsha
Sunday, February 12, 2017
Love Is In The Air
Today finds me with low energy but in the mood to create. I found that I could combine these challenges, CAS(E) this Sketch, Just Us Girls and CAS Watercolour, for a cheerful card that could be used for Valentine's Day or an anniversary.
To start, I did a bit of splotchy watercoloring on a piece of Watercolor Paper. The colors I used were Sweet Sugarplum, Flirty Flamingo and Peekaboo Peach. Once dry, I attached that layer to a card base of Whisper White Thick cardstock. The large hearts were punched from Sweet Sugarplum and Blushing Bride. The Blushing Bride heart was embossed with the Square Lattice Embossing Folder. The little hearts were punched from Flirty Flamingo, Peekaboo Peach, Pink Pirouette and Rich Razzleberry using the heart from the Itty Bitty Accents Punch Pack. The two hearts on the lower left of the card were embossed using the Decorative Dots Embossing Folder.
From the Sunshine Sayings stamp set, I stamped two sentiments onto Whisper White using Basic Black Archival ink. Then, I added a line of Rhinestone Basic Jewels to each label and one to the large Sweet Sugarplum heart.
Here is a close up of the what the Radiant Rain Shimmering Mist looks like. I sprayed the entire front of the card with it so it has a very pretty shimmer to it.
The sketch I used is from the CAS(E) this Sketch Challenge. For all the challenge details and to share your project, click the image below.
The them of hearts is from the Just Us Girls Challenge. For all the challenge details and to share your project, click the image below.
The theme of love is from the CAS Watercolour Card Challenge. For all the challenge details and to share your project, click the image below.
Thanks for stopping in at the Coffee Pot Stamping Cafe,
Marsha
Saturday, February 11, 2017
A Yellow Rose
It's just a short post today. I've been rather under the weather all week long and am just now starting to feel normal again. I've found that being on the computer makes everything worse so I'm limiting my time to a short duration. Here's the card I made for The Flower Challenge where we were to CASE (Copy And Share Everything) the Guest Designer.
Stamp Set: Rose Wonder; Ink: Rich Razzleberry; Watercolor Pencils: Daffodil Delight, Old Olive, Rich Razzleberry; Cardstock: Shimmery White, Very Vanilla; Other: Rose Garden Thinlits Dies, Metal Rimmed Pearls
My card was entered in The Flower Challenge. For all the challenge details and to share your project, click the image below.
Thanks for stopping in at the Coffee Pot Stamping Cafe,
Marsha
Friday, February 10, 2017
Bold Butterfly
One of the things I enjoy doing is combining a sketch challenge with a color challenge. Today I used the sketch from Freshly Made Sketches Challenge and the colors from the Color Throwdown Challenge to make this bold butterfly design. For the challenge colors I used Bermuda Bay for the teal, Tangerine Tango for the orange and, of course, Basic Black for the black. :-)
For the butterfly, using the Butterflies Thinlits Dies, I cut one from Bermuda Bay, one from Tangerine Tango and one from Whisper White. Using a blending tool, I blended color over the Whisper White butterfly. I used Bermuda Bay and Tangerine Tango ink. Then, I covered it with VersaMark and heat embossed it using Clear Embossing Powder. After embossing, I glued the three butterflies together. I used Bermuda Bay sequins on the body of the butterfly to add more dimension.
For the card base I used Whisper White Thick cardstock. The rectangle layer was made placing a piece of Whisper White over a piece of Basic Black. The two small banners were punched from Bermuda Bay and Tangerine Tango using the Triple Banner Punch.
The sentiment from the Jar of Love stamp set and the antennae from the Papillon Potpourri stamp set were stamped using Tuxedo Black Memento ink.
For all the challenge details and to share your project, visit Freshly Made Sketches Challenge and Color Throwdown Challenge by clicking the images below.
Thanks for stopping in at the Coffee Pot Stamping Cafe,
Marsha
Thursday, February 9, 2017
Happy Valentine's Day
It isn't often that I have the opportunity to combine three different challenges. Today found me able to combine the CAS(E) this Sketch Challenge, the Retro Rubber Challenge and The Paper Players Challenge.
For the card base I used Blushing Bride and added a layer of Whisper White. The large hearts are punched from Real Red cardstock using the Sweetheart Punch. The smaller hearts are punched from Blushing Bride cardstock and Pink Pirouette cardstock using the Small Heart Punch. To the hearts I added Rhinestone Basic Jewels. The sentiment is from the 2009 Teeny Tiny Wishes stamp set and stamped in Basic Black Archival ink.
The sketch I used is from the CAS(E) this Sketch Challenge. For all the challenge details and to share your project, click the image below.
I used the theme of hearts from the Retro Rubber Challenge. For all the challenge details and to share your project, click the image below.
I used the Valentine theme from The Paper Players Challenge. For all the challenge details and to share your project, click the image below.
Thanks for stopping in at the Coffee Pot Stamping Cafe,
Marsha
Wednesday, February 8, 2017
Watercooler Wednesday Challenges #105
My card starts with a Very Vanilla card base to which I added a strip of patterned paper from the Serene Scenery Designer Series Paper Stack. The flowers and leaves were cut using the Botanical Builder Framelits Dies. For my colors, I chose Flirty Flamingo, Peekaboo Peach and Rich Razzleberry for the flowers. For the leaves, I chose Mint Macaron and Mossy Meadow. On the Mint Macaron leaves, I stamped an image from the Botanical Blooms stamp set. To the center of each flower I added a Metal Rimmed Pearl. The sentiment is from the Rose Wonder stamp set and is stamped in Basic Black Archival ink.
For all the challenge details and to share your project, visit Watercooler Wednesday Challenges by clicking the image below. We'd love to have you join us. You have until Monday, February 13th at 6:00 p.m. Central Time to link your project.
Thanks for stopping in at the Coffee Pot Stamping Cafe,
Marsha
Tuesday, February 7, 2017
CAS Colours & Sketches Challenge #209
It's so exciting to be able to share with you that I was selected to be a Guest Designer for the month of February with the CAS Colours & Sketches Challenge. I love challenges and to be asked to design for them for a month is such an honor. This week it's a color challenge with some of my favorite colors.
The flowers were cut using the Tattered Florals Die by Tim Holtz. I used Cherry Cobbler, Rose Red and Sweet Sugarplum for the flowers. The branches were cut from Smoky Slate using the Leafy Branch Die also by Tim Holtz. I attached them to the Whisper White mat layer using Tombow Multipurpose Glue. The white buttons each have a piece of Linen Thread threaded through them then, they were attached to the center of the flowers using Glue Dots. The blossoms were attached using Stampin' Dimensionals. The sentiment is from the Jar of Love stamp set and stamped in Tuxedo Black Memento ink. To the layer I also added three Sweet Sugarplum Fancy Frost Sequins. For the finishing touch I sprayed the card with Radiant Rain Shimmering ICE Mist by Splash of Color. The mat layer was attached to a Whisper White Thick card base using Stampin' Dimensionals.
The Shimmering Mist doesn't show up well in the photo so here is a close up to give you an idea of what it looks like. If you click on the image below, it will open it up so you can get a better view of how pretty and shimmery the flowers look.
For all the CAS Colours & Sketches Challenge details and to share your project, click the image below.
Thanks for stopping in at the Coffee Pot Stamping Cafe,
Marsha
Sunday, February 5, 2017
Hello
While my pizza is baking, I have time for a short post to share the card I made for the current CAS Colours & Sketches Challenge. I found I had all the colors, in one form or another, that I needed for the challenge without having to find a close match. Yes, I was surprised.
The card base is Shimmery White. I found a piece of Peach Parfait cardstock and embossed it with the Vintage Wallpaper Embossing Folder. The ribbon I added is actually the 5/8" Whisper White Organza Ribbon that I used my Dusty Durango Stampin' Write Marker to add color. I think it looks really well with that Peach Parfait. Don't you?
I stamped an image from the Fabulous Flora stamp set in Basic Black Archival ink onto a piece of Shimmery White and watercolored it using a Sage Shadow Watercolor Wonder Crayon. Then, I cut it out using one of the ovals from the Stitched Shapes Framelits Dies. The sentiment is stamped in Basic Black Archival and is also from the Fabulous Flora stamp set.
When I stamped the sentiment, it left a bit of a mark where you see the line of Pearl Basic Jewels. It was one way to cover up the mistake and not have to start the card over. I think it worked rather well. I also added a pearl to the leaves in the image to finish out the design.
The colors and sketch I used are from the CAS Colours & Sketches Challenge. For all the challenge details and to share your project, click the image below.
Thanks for stopping in at the Coffee Pot Stamping Cafe,
Marsha
Wednesday, February 1, 2017
Watercooler Wednesday Challenges #104
This week at Watercooler Wednesday Challenges, Kath is hosting a sketch challenge and she's chosen a very nice one. It gave me a great opportunity to use those Stitched Shapes Framelits Dies along with the new Beautiful You stamp set. Her dress was watercolored using the new Watercolor Pencils. The color I used is Calypso Coral. It's a pastel version of Calypso Coral due to the water coloring. I'm going to love having those watercolor pencils.
Stamp Sets: Beautiful You, High Tide, Rose Wonder (sentiment); Inks: Basic Black Archival, Calypso Coral, Peekaboo Peach; Cardstock: Emerald Envy, Whisper White Thick; Patterned Paper: 2016-18 In Color Designer Series Paper Stack; Other: Stitched Shapes Framelits Dies, Watercolor Pencils (Calypso Coral), Rhinestone Basic Jewels
For all the challenge details and to share your project, visit Watercooler Wednesday Challenges by clicking the image below. We'd love to have you join us. You have until Monday, February 6th at 6:00 p.m. Central Time to link your project.
Thanks for stopping in at the Coffee Pot Stamping Cafe,
Marsha


